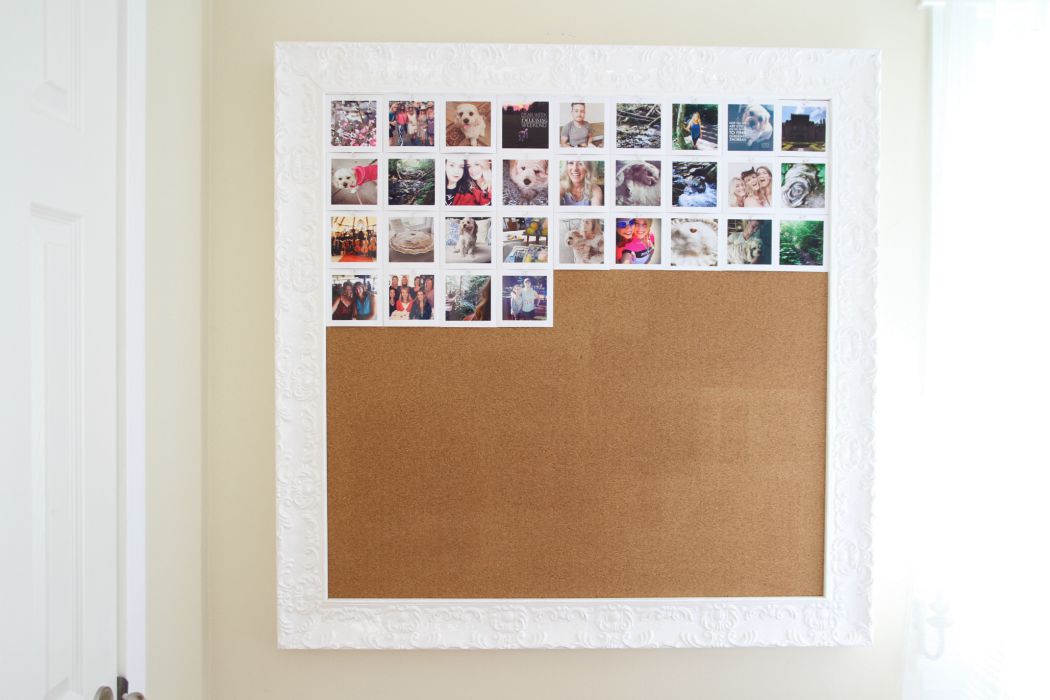
I have so many lovely photos on Instagram and thought it would be nice to create some sort of display on a budget. You may recall this bulletin board I had made at a local frame shop a few years ago.
.jpg)
It was my “catch all” for random art ideas and photography prints. But somehow it just didn’t have any sort of cohesive look when utilized that way.
I decided the square shape would be perfect for my latest
“insta-inspiration”, an
Instagram Memory Board
♥
Being able to download my Instagram photos was the only hurdle to cross. If you are familiar with Instagram there is typically no way to download photographs as you can with Facebook. I was totally resigned to finding an online company that would make prints and mail them to me at a cost. But after little “digging around”, I was excited to discover this website:
This site allows you to log in to your Instagram account and right click to save your own photos. I inserted them into a 4×6 blank template on Picmonkey (I’m sure most photo editing softwares can do the same thing) and then printed them on 4×6 printer photo paper on my own printer. All that remained was squaring off the photos, either with scissors or with a paper trimmer.
.jpg)
I laid them all out on the table in an arrangement I thought I might like. These photos in the picture below just haven’t been trimmed yet. In fact, if you wanted to create a Polaroid look, just leave a wider border at the bottom of your photos when cutting.
.jpg)
Then I just pinned them up, I used clear stick pins instead of tacks because I didn’t want the actual pins to show up on my display. I also could have used washi tape but wanted a “cleaner” look.
♥
I love how it turned out!!
It’s similar to those expensive print-outs you can order on large sheets of paper, but mine allows you to change out the photos whenever you wish.
I was fortunate that my bulletin board, being square as well, was the perfect size for 9 photo-wide display. But I think it could look nice if you started in the middle and worked out and had a border around the edges too.
.jpg)
Obviously this is a very linear and geometric look, but you could definitely just pin your photos in a more random arrangement if you preferred.
.jpg)
Total Cost for this Project: 4×6 photo paper (mine came free in a bundle with printer ink)
printer ink, bulletin board
♥
Wouldn’t this be pretty in a baby nursery?
.jpg)
I can’t wait to see new memories on my
Instagram Memory Board!
I’m quite certain this one is next:
.png)
♥
I’ll bet IKEA, stationery and craft shops all have bulletin boards that could be used for this purpose.
♥
To Make Your Own Bulletin Board: I took a wide roll of sheet bulletin board/cork board and 2-3 packages of tiles of cork board (purchased at my local Michaels Craft Store) to a framing shop. I selected the frame I wanted and he glued the sheet cork to the tiles and then placed a mat behind everything to give it depth for pinning and then framed it. It’s quite heavy and needed to have heavy duty hooks on the back of the frame to hang and also needed to be secured to the wall using thick wire and nailed into wall studs (or use wall anchors). My bulletin board measures 3 feet x 3 feet in the area inside the frame.
.jpg)
♥
A little tip, I had several photos that I wished were on Instagram for this project. So in true “Just a Smidgen” fashion, I posted tons of photos all at one time and was immediately reprimanded by my daughter because one “isn’t supposed to do that” as it inundates your followers’ feed with all of your photos. I was actually aware of this social media “faux pas”, but threw caution to the wind because I wanted them for my project. So if you follow me on Instagram, please accept my humble apologies!
- Bulletin Board
- 4x6 Photo Paper
- Printer
- Scissors or Cutting Board
- Open up the website collect.to and sign in with your Instagram Account.
- Navigate to your home page by clicking on your name on the right hand side of the collect.to page. This is where you will see all of your Instagram photos.
- Right click “Open Link in New Tab”.
- Open up that tab, then right click the large image and “Save Image As”. Make sure to save it to a new folder you make called “Instagram Project”. *
- Open up your favourite photo editing software, I use www.picmonky.com. From the top icon menus select “Design” and 4x6.
- Click on the left hand side Butterfly icon. Then select “Your Own” from the top. Choose the photo you’ve just saved in the “Instagram Project” folder.
- Click to move then drag your photo to fill the top portion of the 4x6 space, leaving equal space on top and sides of the page.
- Save to your “Instagram Project” with a new name.
- Open Finder on your Mac and open your “Instagram Project” folder and double click on the 4x6 photo you’ve just saved.
- Then go to the top and select “File” then “Print”. Make sure to select photo on photo paper and 4x6 (do NOT select “borderless” this will change your spacing)
- Using scissors or a cutting board, cut the photo so that it is a complete square.
- Pin on your bulletin board with clear pins or colourful pins as you wish.


What a fun project!! Yours looks great.