.jpg)
I know.. it’s not even close to spring, but just look what I found for you on Pinterest today!
A Spring Pastel Pinterest Gallery
one two three four
five six seven eight
nine ten eleven twelve
thirteen fourteen fifteen sixteen
seventeen eighteen nineteen twenty
♥
Pinterest
is always a positive and uplifting source of inspiration…
{ slightly addicting }
handcrafted, baked, photographed, styled
it’s all there!
♥
I had my toenails painted, just like the photo above
I thought they looked like Hershey Eggies.
Not everyone liked them..
He actually wrote that he wished there was a “Dislike” button on Facebook…
Anyhoo.. moving right along..
♥
Printemps | Spring
brings to mind gentle pastel ice-cream shades
and an opportunity to bake still another birthday cake
this one for my husband..
I am so blessed to have him in my life!
{ He liked my pedicure.. well, if he didn’t, he had the good sense not to say so! }
♥
It is also my Dad’s Birthday this week… His 80th!!
My wish?
That he could join us for the celebration!
♥
Happy Birthday Dave!
Happy 80th Birthday Dad!
♥
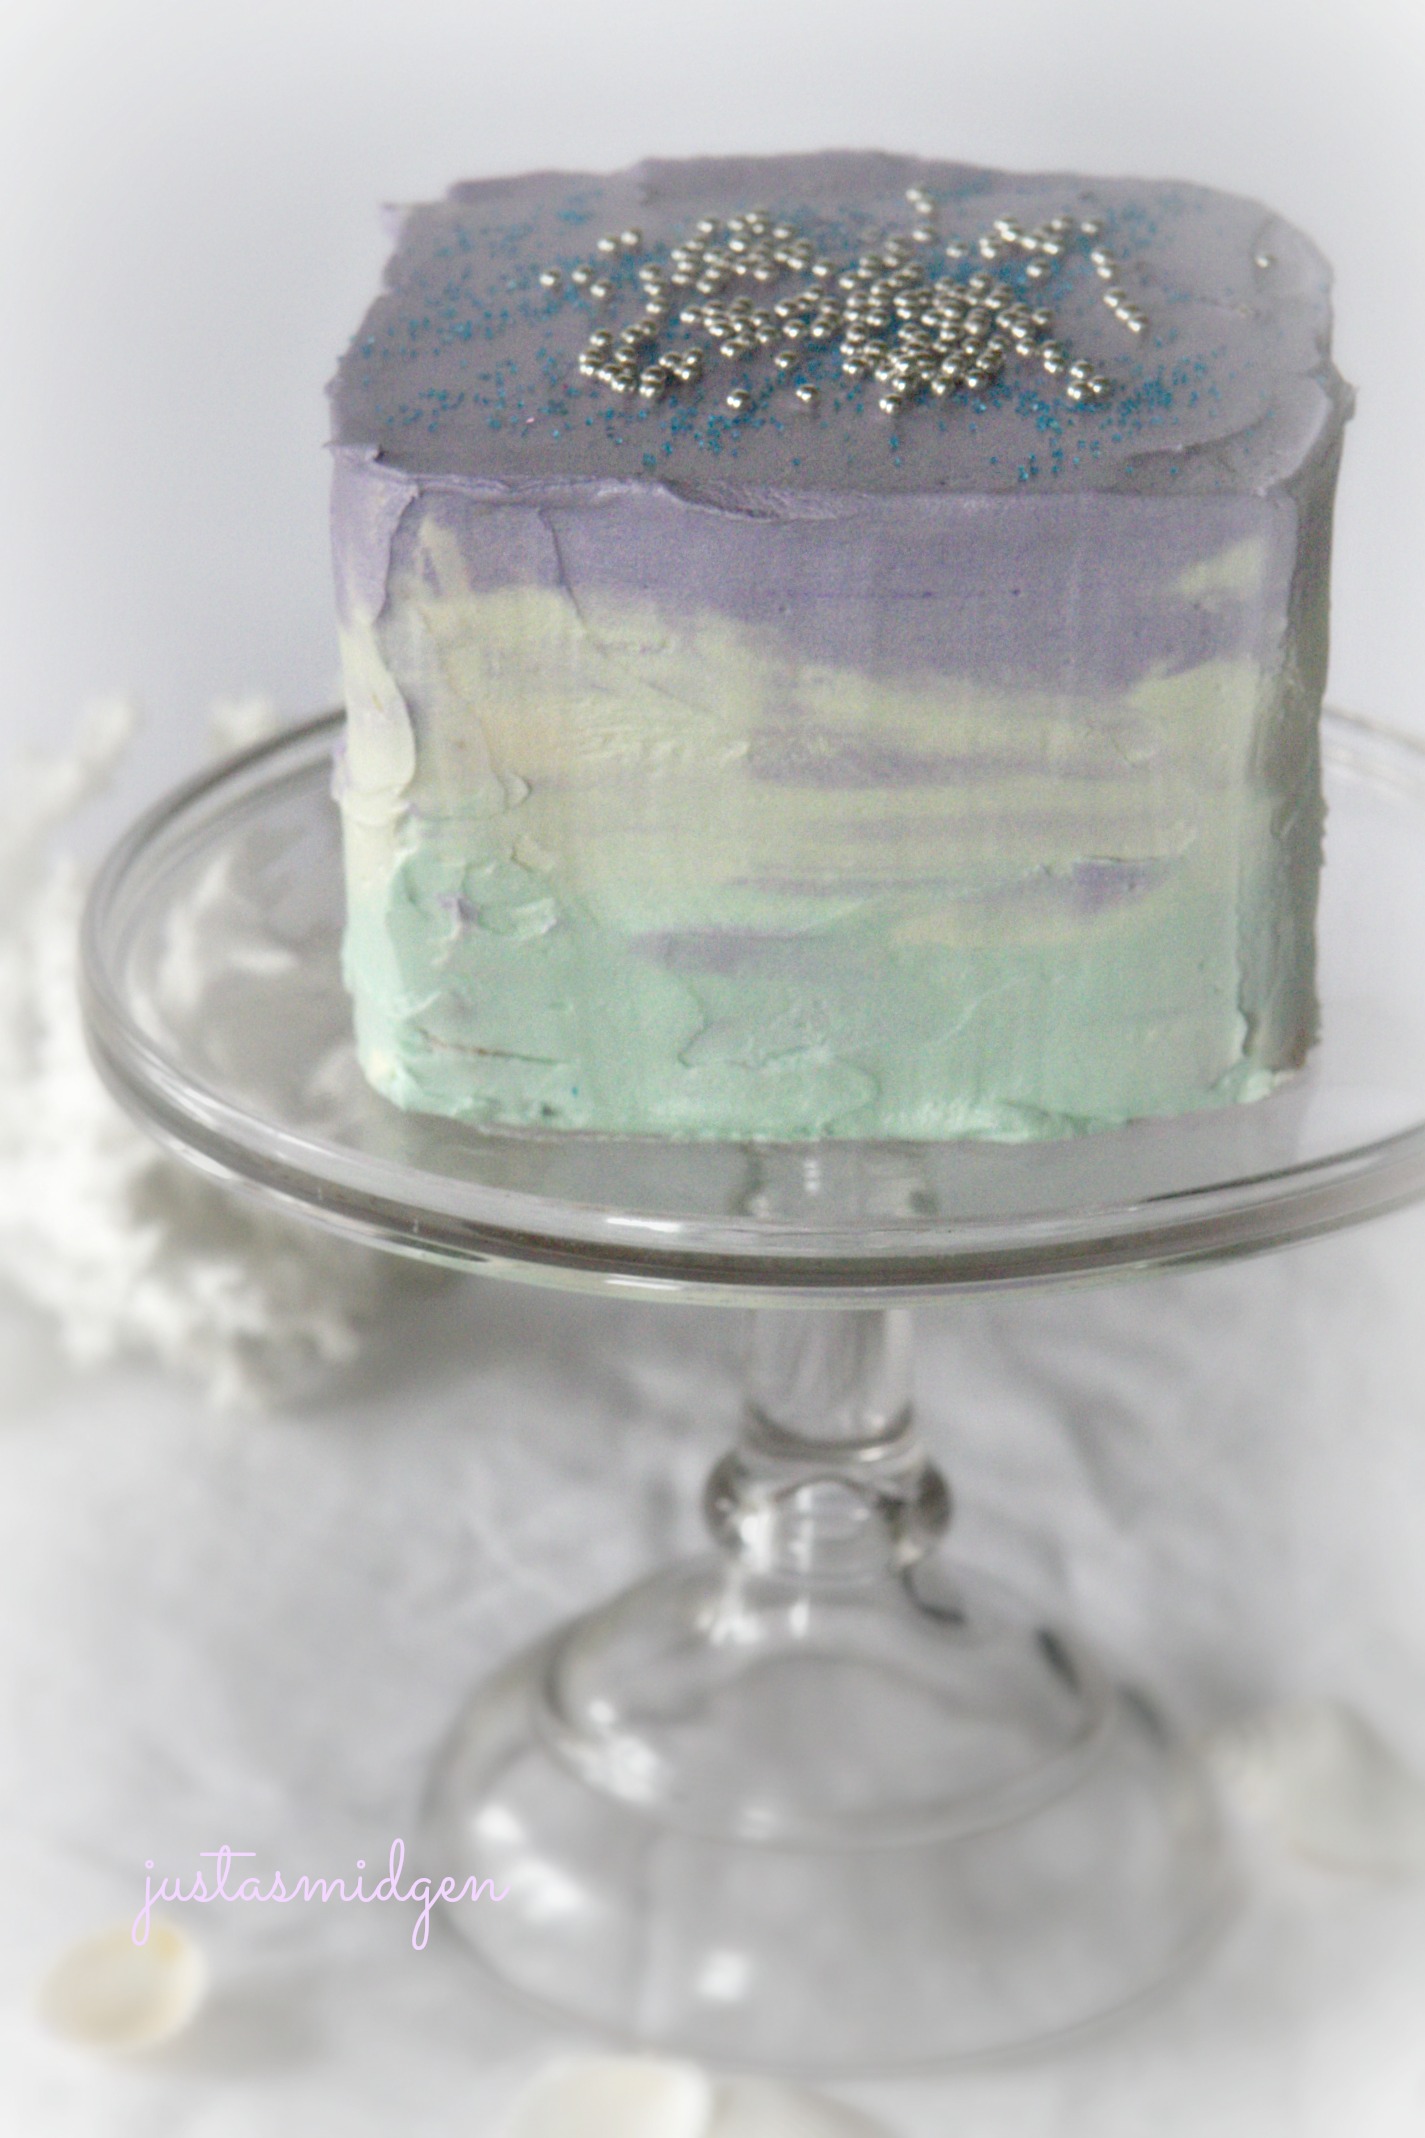
This cake isn’t anything like my Man “S’mores” Cake from last year.. I was trying to go for an ocean/beach effect.. but it ended up looking a bit like a giant ice-cube..
{ I was thinking I should have put a penguin on top:D }.jpg)
This cake was inspired by Sweetapolita with its pastel ombre frosting,
only I used a bench scraper to try to get a more polished effect.
It wasn’t as easy to do as I thought… but it tasted amazing layered with chocolate pastel crushed Hershey’s Eggies
This lovely cake is a recipe from Cooks Illustrated
{ emphatically written }
This is a cake you need to bake!
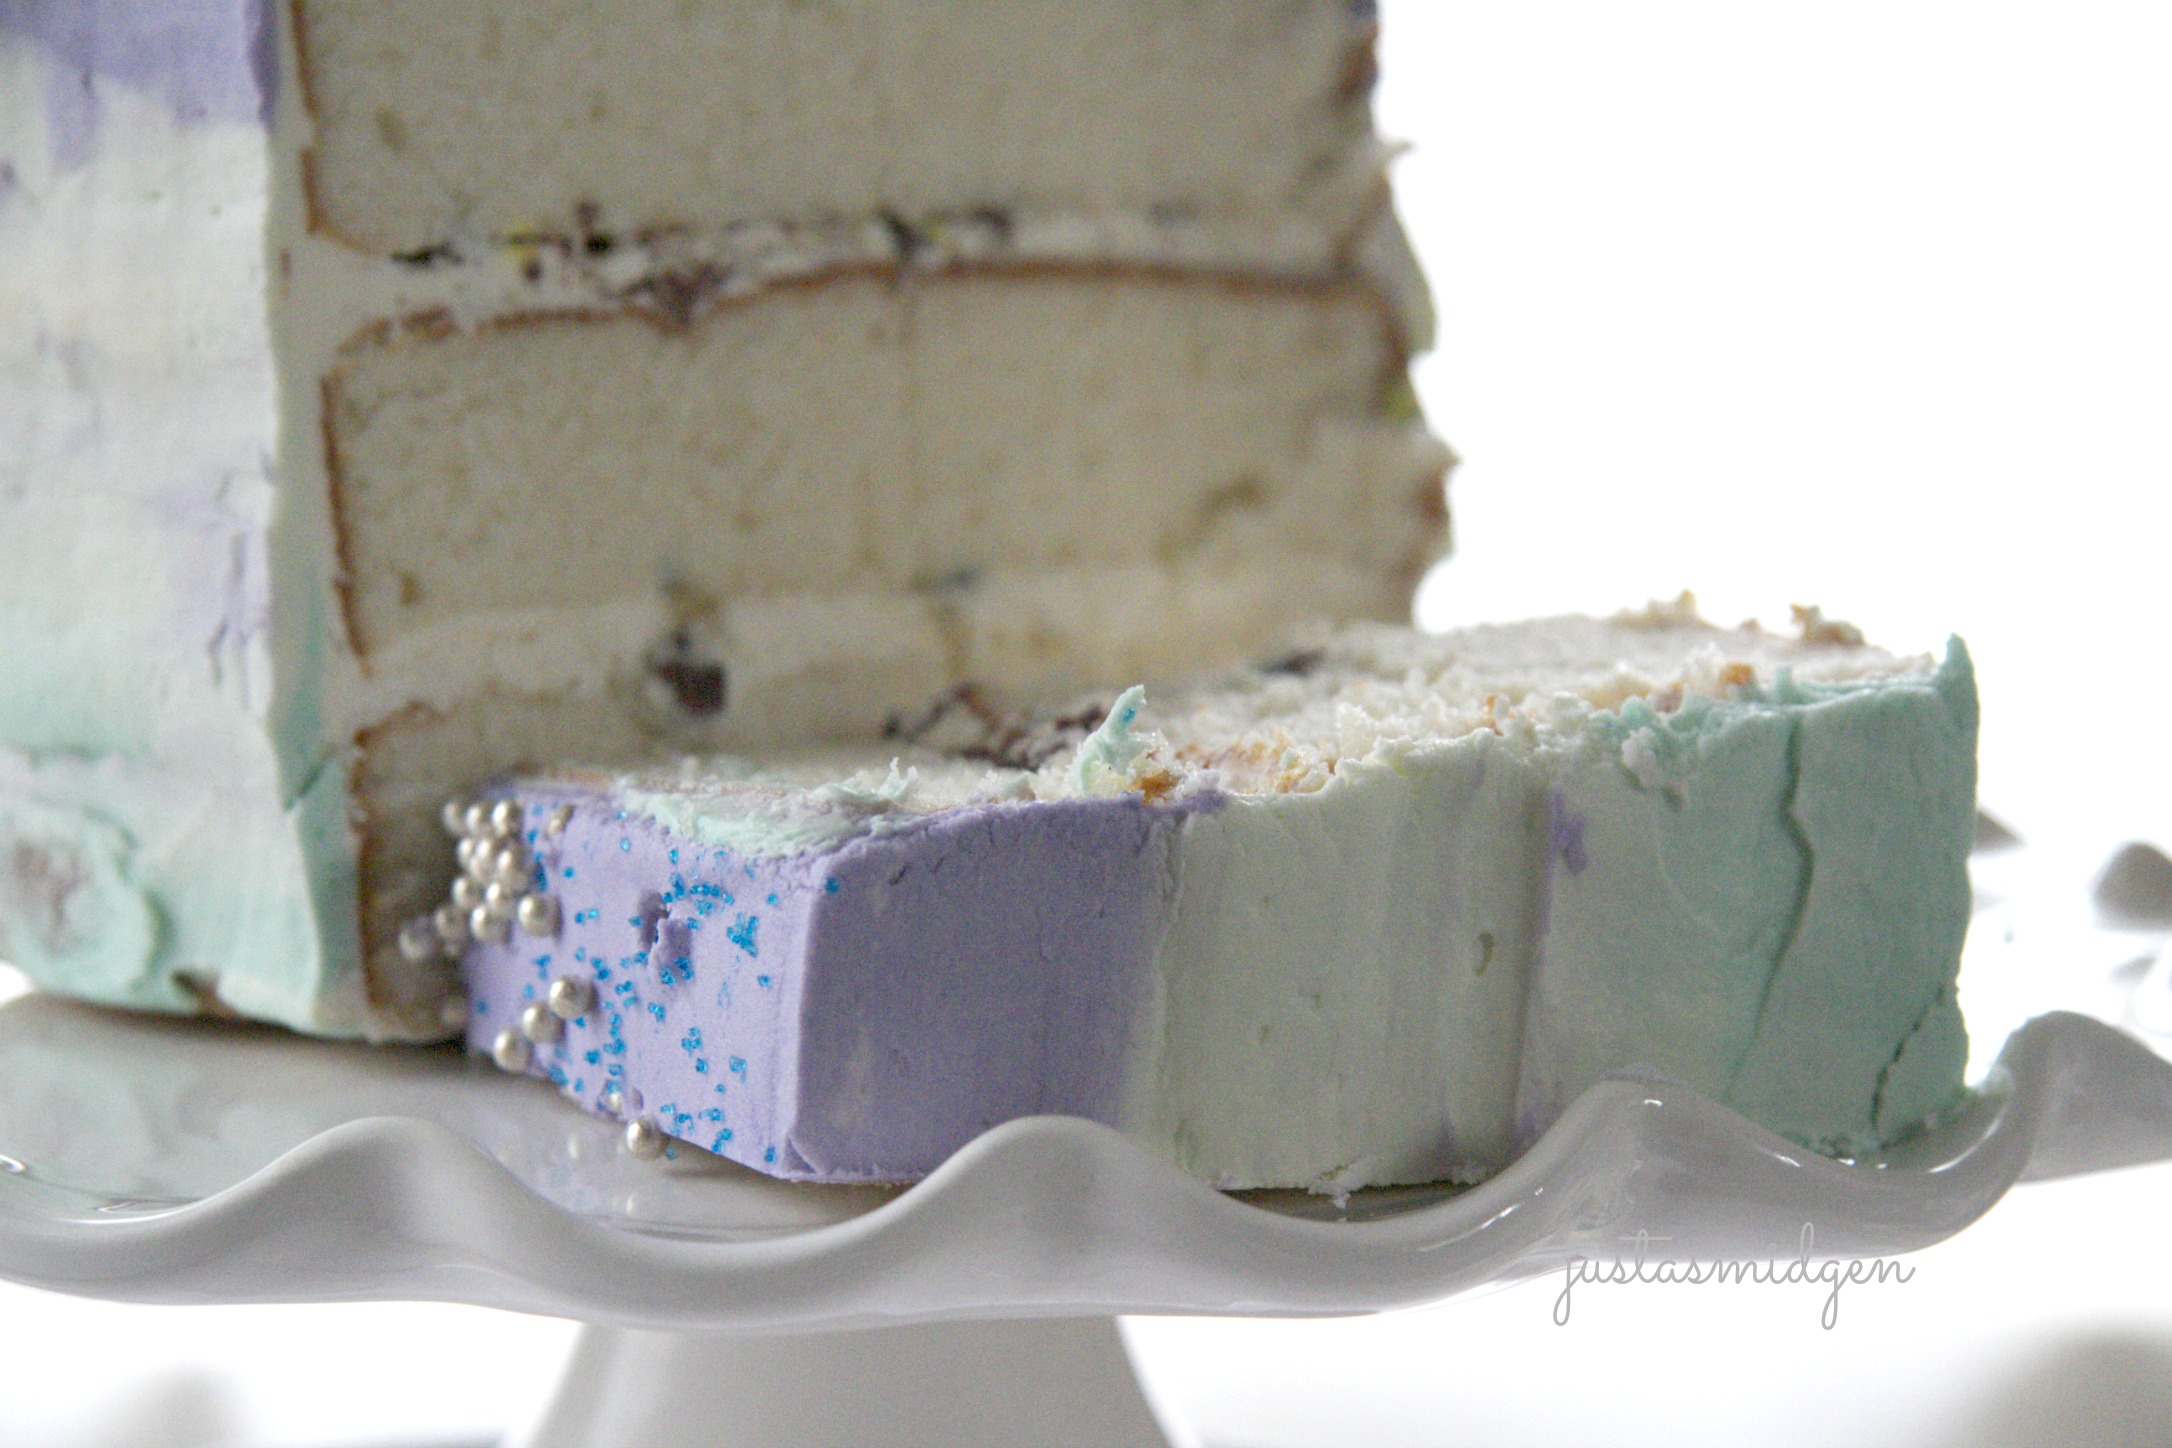
It’s crumb is so fine you can’t see any air pockets, yet amazingly delicate, light and fluffy. Best of all, it was still sturdy enough to hold up when you slice into it.
Sweetapolita + Cooks Illustrated = Bliss
♥
- 2 1/4 cups cake flour
- 1 cup whole milk (at room temperature)
- 6 large egg whites (3/4 cup) (at room temperature)
- 2 teaspoons almond extract
- 1 teaspoon vanilla extract
- 1 3/4 cups granulated sugar
- 4 teaspoons baking powder
- 1 teaspoon salt
- 1 1/2 stick (12 tbsp) butter, unsalted, softened but still cool
- 2 9? round cake pans or 3 6? square pans
- With oven rack in the center of the oven, preheat the oven to 350° F.
- Prepare your baking pans, spray with Baking Spray or grease with butter. Line the bottom with wax or parchment paper and spray/grease that as well. Dump a few tablespoons of flour in each and shake it around until coated with flour. Invert and bang to remove excess flour.
- In a small mixing bowl, whisk together the warm milk, egg whites, almond and vanilla extract.
- In a mixer fitted with a paddle attachment, add the cake flour, sugar, baking powder and salt. Mix on low until the dry ingredients have blended. Loosely cut the butter into chunks and add to the dry flour mixture. Blend on low until the mixture looks somewhat like bread crumbs.
- Slowly add in all but 1/2 cup of the milk mixture and blend for 1 1/2 minutes on medium speed (high if using a hand-held mixer). Mix in the remaining 1/2 cup of milk mixture and blend, scraping down the sides occasionally, and beat for another 20 seconds.
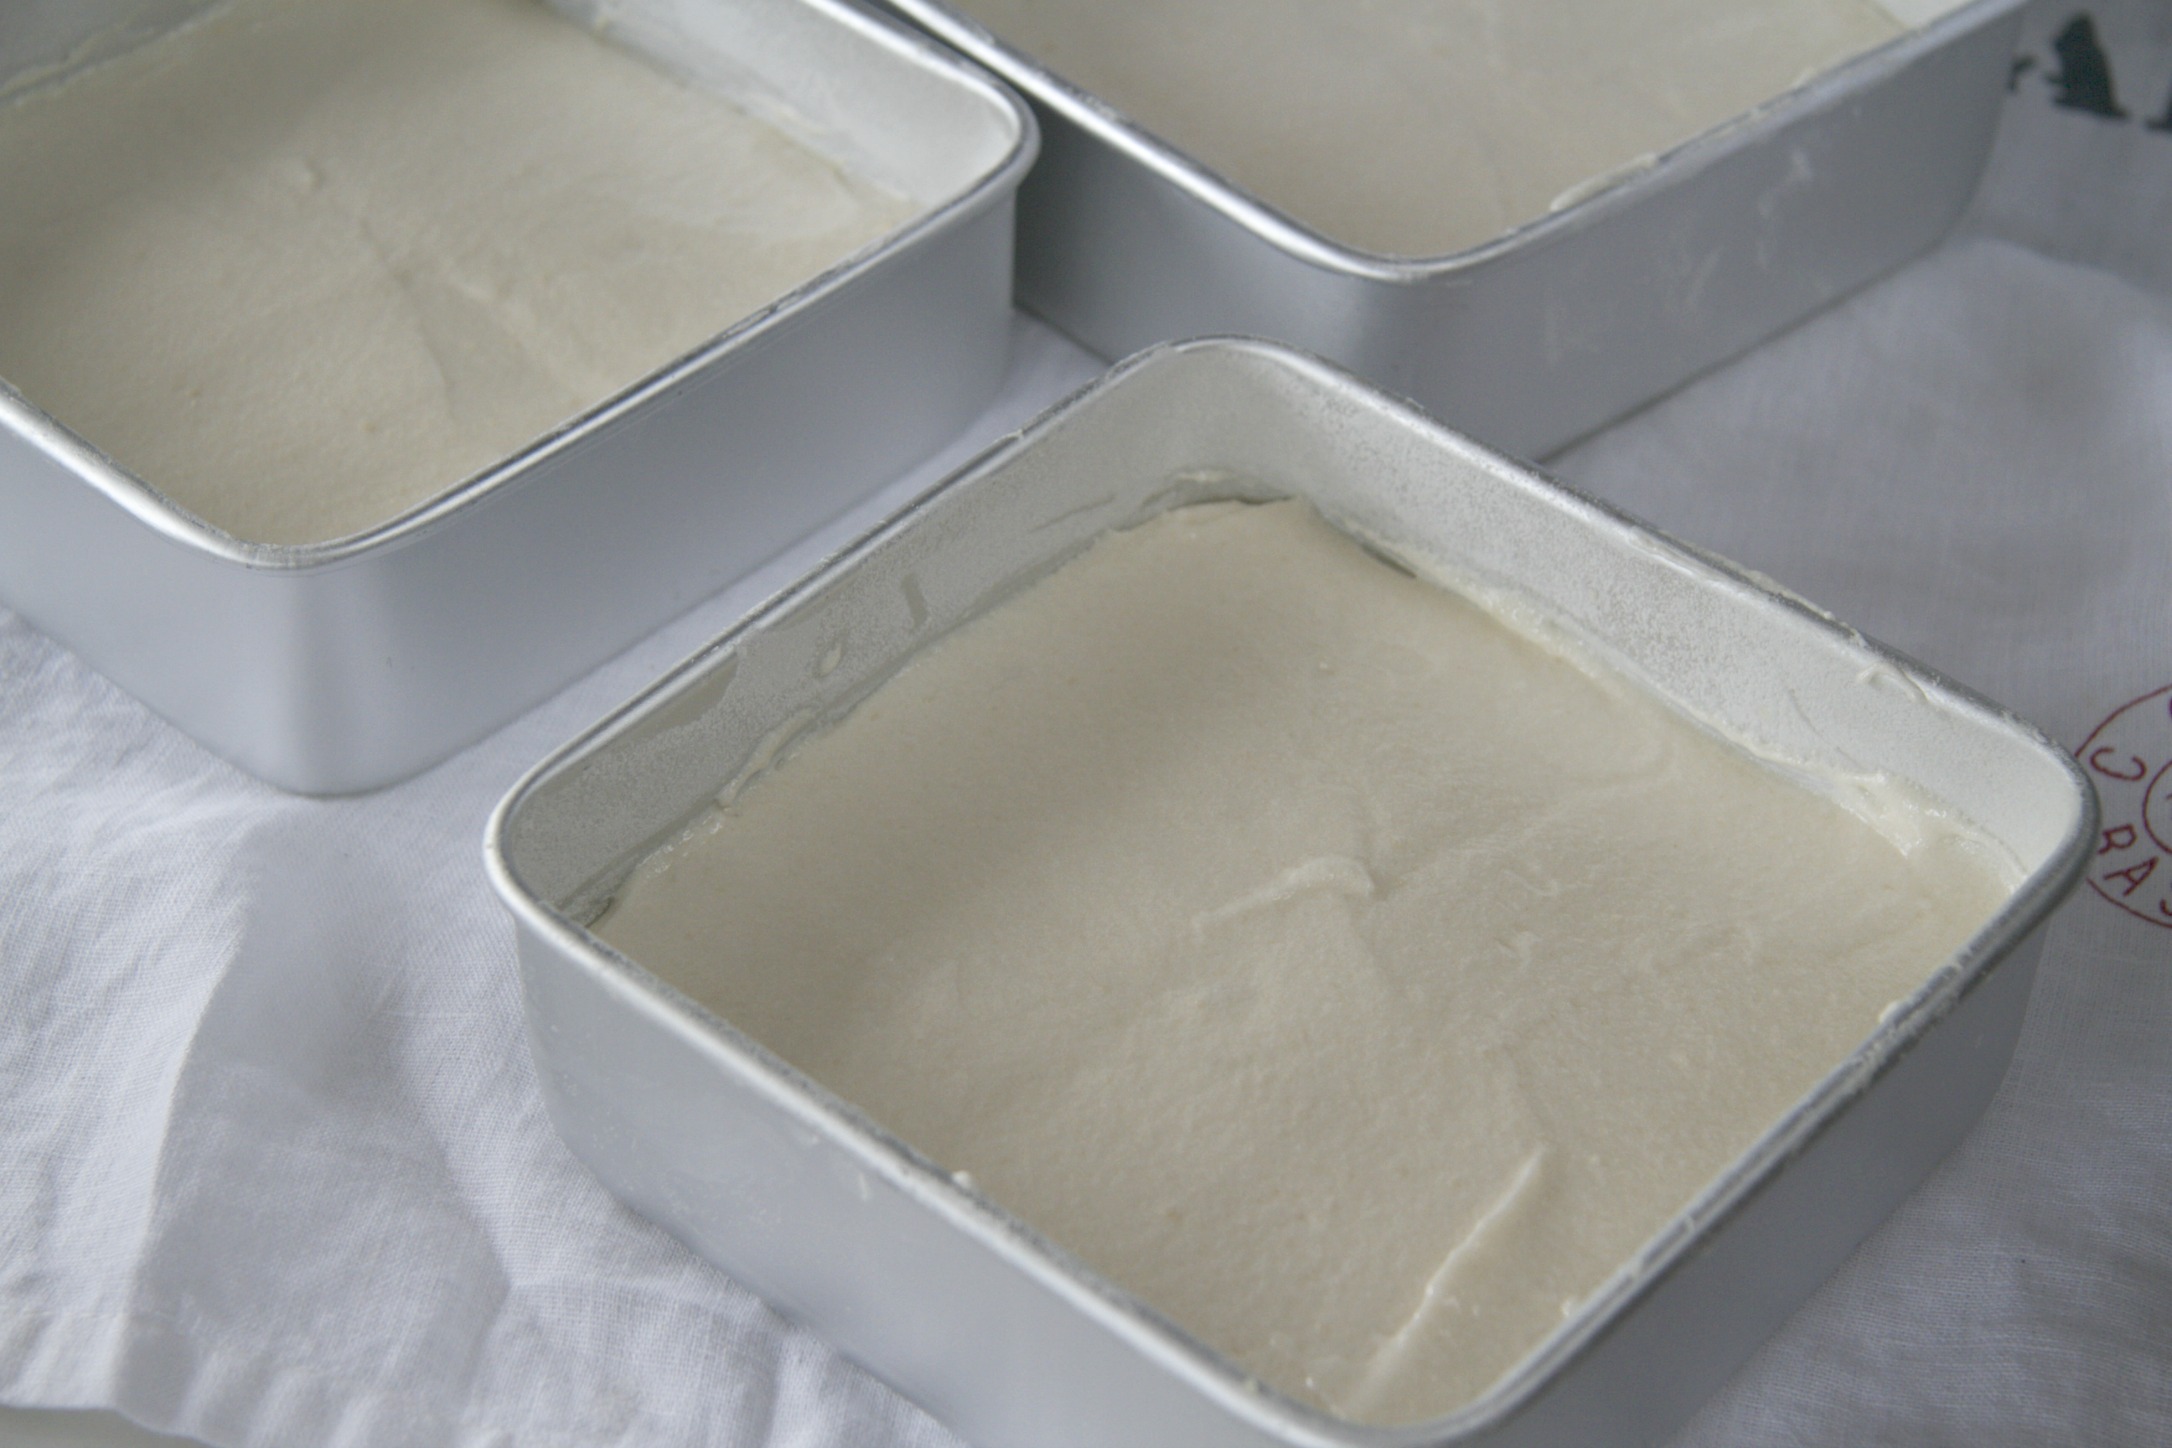
- Divide batter evenly between your prepared pans. My small square pans used 2 1/4 cups batter each. Place the pans in the oven, staggering them so that they are 3? from the oven walls and each other. Use a second rack if necessary. Bake until a skewer inserted in the center comes out clean, the tops are lightly browned and the cake is just pulling away from the edges.
- Total baking time in smaller pans was 18-20 minutes in a convection oven. 2 9? round cake pans bakes for about 23-25 minutes.
- Take them from the oven and let them rest on a wire rack for about 3 minutes. Then invert them, peel off the wax paper, then turn them back right side up on the wire rack until they’ve cooled completely. (I left mine upside down so the tops would flatten while they cooled.)
&
The only change I made to this frosting recipe, was to reduce the butter by two tablespoons. Next time, I would also make an extra 1/4 to 1/2 batch of frosting to have extra for the filling and crumb coat.
- 3 sticks butter, at room temperature, cut into chunks
- 3 1/2 cups confectioners (powdered) sugar
- 3 tbsp whole milk
- 1 tbsp pure vanilla extract
- pinch of salt
- Wilton Violet Food Coloring/Icing Gel
- Wilton Teal Food Coloring/Icing Gel
- In the bowl of an electric mixer fitted with a paddle attachment, whip the butter for 8 minutes on medium speed (#4 on a KitchenAid). Note: Make sure to set the timer and go the full 8 minutes. During this time the butter changes texture, becomes lighter in color and very fluffy.
- On low speed, add the remaining ingredients, blending for another minute. Turn the mixer back up to medium speed and blend for 6 minutes more. This frosting is so whipped and fluffy, it is best used right away for spreading consistency.
- Divide the frosting into three bowls, with a slightly greater amount for your top color. This color was made using Wilton Violet. Tint the bottom layer’s frosting with Wilton Teal, then tint the middle layer also with the Teal color, just make sure it’s lighter in shade.
- cake layers
- frosting (3 colors)
- 2 small packages pastel Hershey’s Eggies
- silver dragées and blue jimmies
- Using a sharp, serrated knife, gently cut the rounded tops of each cake layer so that they are flat. Place one layer on the bottom of your cake dish, smearing a tiny dollop of frosting underneath to hold it in place. If you wish, slide pieces of waxed paper around the bottom to capture icing drips.
- Spread the desired thickness of frosting/filling on top of this layer. Then, using the side of a large knife, crush the Hershey Eggies into large chunks. Scatter them over the layer. Place the second layer on top. Frost then scatter with Eggies again. Place the final layer on top. Smooth a modest amount of frosting over the entire cake’s top and sides to make a thin Crumb Coat, just enough to fill in any gaps and create a smooth finish.
- Place the cake into the fridge for at least 20 minutes to set the crumb coat. Then remove and set on a cake spinner if you have one.
- Using a large offset spatula, dollop a large amount of Violet frosting. Smooth it across and slightly over the edge.
- Then using the darker teal color, gently place frosting around the bottom of the cake.
- Repeat using the lighter teal frosting, gently patting around the cake in the center.
- Using an slightly angled offset spatula or a bench scraper, slowly drag the icing across from one side to the other. Remove the excess frosting from your scraper. Repeat and blend all four sides. The different shades of icing will begin to blend and make a variety of new shades and create an ombre effect. This technique is not perfectly smooth (as you can see from my photos) but makes a pretty minimalistic cake. Scatter the top with the silver dragées and jimmies. Alternative, a large rose or a few peonies would look gorgeous on top as well.

.jpg)
.jpg)


I adore the ombre effect on this – so sophisticated! xx
I just need another birthday or event so I can figure out a different top, so it doesn’t look so “square” by itself:) xx
I’m sure you will find an occasion, Smidge! xx
I know this is going to be one of your posts that I’ll have to go back and reread, so I can make sure I saw all of the pretty details you included. Happy birthday to your Dad and hubby too! I love the look of your square cake…it’s lovely. 🙂
I will let them know.. but they may already be reading this:) xx
What a lovely inspiration board – those sweetpea cakes (number five) are just too sweet! I watched Sweetapolita’s pastel cake video the other day and I was also reading another blog extolling the virtues of the Cook’s Illustrated white cake – we must be on the same wavelength! I like your addition of the chocolate eggs 🙂
I think we must be.. but how could we not, they’ve got such beautiful creations! I’m so inspired when I visit them.. and when I visit you!! xx
Happy birthday all around my friend you certainly made it extra special with this wonderful dessert 🙂
Cheers
Choc Chip Uru
I have to bookmark this because I would like to make something with those eggies for Easter. Aren’t they just the best? I’ve been noticing that I am drawn to pastel colours, even though I don’t have the opportunity to decorate with them anymore (marriage = compromise). Have you seen this month’s issue of Style at Home magazine? I just love the colours in the feature spread . . . and I’m thinking that you would too!
I was thinking the same as I see adorable homes decorated all in white, that wouldn’t go over very well here either, lol! I haven’t seen the magazine.. but I’m going to find a copy, I love that magazine and House and Home. I also thought, kids would do a better job dotting the top with those eggies:) xx
Always enjoy seeing and reading about your beautiful creations. Do you teach others? I also loved the effect you created with your petal cookies with a touch of pale pink! So talented!
I haven’t been asked to teach yet.. It would be fun!! Thanks so much!xx
I love the toenails !!! They look pretty enough to eat heehee. And that cake looks utterly divine ! Happy birthday daddy Smidge !
That’s what I thought, lol! But perhaps others have a toe-phobia;) I will tell him.. he’s officially now Daddy Smidge, does that make my husband Mr. Smidge? xx
Mr Smidge works!!
A little penguin on top would be just perfect Barbara. I can see one standing and one on its belly about to fly off the iceberg into the water. Beautiful Pinterest board. It’s very nearly spring over there so you’re not that early!
Happy Birthday to the 2 best men in your life! Wow this little 3 decorated masterpiece looks like a lot of work but it is very beautiful and sets a little spring into my step. I sure hope that you painted your toes to match your cake to help out with the whole jump into spring experience. I know it is a tad cold to wear flipflops in the snow but maybe just this once…Take Care, BAM
I can scroll through your posts all day, they are always so beautifully put together Smidge!
🙂 Mandy xo
Such a nice post, Barb, and salute to the colors of the Spring we know will eventually arrive. That cake of yours is incredible! A real beauty and the perfect birthday cake for someone so special. I’m sure he was very happy with it. I hope both of these men in your life had wonderful birthdays with a great year ahead.
The cake is gorgeous. Congratulations Barb’s dad!! 🙂
The printemps tableau is gorgeous, thanks for sharing!
I can tell you are hanging out for the arrival of Spring. Not long to go now. What a gorgeous cake. I love the swirling colours. I’ve made cube cakes before and no, they’re not as easy as they look – one must have a very good engineering eye to get the levels right! Happy 80th to your dad – a great milestone xx
Happy birthday to your hubby and Dad, what a great looking cake. I just love the colours. I started using Pinterest but haven’t really got into it.
Another work of art! Looking forward to the colors of spring myself! Hope the birthdays were grand!
Just another work of art from you! My Birthday is coming up in a couple of weeks, so I’m glad I gave you enough advance notice 😉
seriously, very professional-looking cake, Smidge – Happy Birthday to your Dad, he and your Mom did a fantastic job raising you..
Beautiful and well constructed…a perfect wife to husband gift. Also, with sloppy old snow all around in St. Loius, your touch of Spring is well appreciated. Very nice!
Smidge you are so talented and creative. What a beautiful cake! Makes me want to reach into the computer screen and grab a slice. Love the beautiful spring colors and I do love a fine cake crumb. I think I’ll have to attempt this one. 🙂 Happy Tuesday!
This post makes me long for spring. All these gorgeous colors are sooooooo soothing. And the cake! Oh Smidge, you are amazing. It’s beautiful! I love anything out of Cook’s Illustrated, and with a little Smidge magic added….well, a girl can’t ask for anything else 🙂
Happy Birthday Dad! Happy Birthday Hubby!
Everything you do is so beautiful…just wondering ..did you grow up with a mother who inspired you or did you decide to pursue on your own…? Diane
Smidge your cakes to me, are legendary. And I’m not a HUGE cake person at all. But I would eat and make this 🙂
I am always a month or two ahead when it comes to thinking about Spring. Walking to the car this morning I was watching the quail and their crazy antics – love is in the air – ha! Happy Tuesday:)
You know my birthday was yesterday and I didn’t have any cake?
Your lovely post and creations have made my 43-year-old mouth water!
Love your square cake and the spring colors. Happy birthday to the 2 men in your life.
Such a pretty and delicious looking cake!
Birthday blessings to the men in your life! That cake looks like I need a slice 🙂
Love those pastel colours in that cake, very nice to look at
So beautiful (and I love the pedicure too!). Birthday greetings to your loved ones 🙂
I absolutely love this cake! I think you did a fantastic job. It is really beautiful and I really love the colors of the icing. It is so perfect for Spring and looks absolutely delicious!
Don’t you just love Cook’s Illustrated?!!?! This does look like the perfect white cake! It’s SO PRETTY!
Fusing cake and art!
What, Spring not even close? I’d swear it just arrived! I should have known to look for it here! Next year I will (and I’ll start looking in January!) Happy birthday Dave – this easter-egg-toed wife of yours sure knows how to let a person know they’re special! You’re a lucky guy, but then, you knew that! And we all know, we’re lucky too! (Beautifully done Smidge!) xxo
I don’t think I could ever make a prettier cake! Beautiful!
i love the pinterest collage u put together.. all those pastel colours are so lovely!
i’ve been wanting to paint my nails a pastel green. havent gotten round buying the nail polish though!
what a great idea for an ombre cake! would love to do it sometime..
I think we all all looking forward to the pastel colors of spring. Your cake looks like a modern painting to me…love the marbled effect on the sides.
Loving your blog and the pictures – even though I can’t cook myself. But it’s nice to look at your inspiring photographs 🙂
The pastel color makes me smile–and feel warm. Spring is so close… 🙂
I love the square cake. I’ve got to put that on my shopping list- square tins..x
They are so much fun, I just picked them up at Michaels.. maybe next time I’ll stack one on a round cake;)
Such a stunning and romantic cake Barb. Your husband is a very lucky man. Happy belated birthday to him and your dad. What a sweet woman you are to those you love.
This post is not only GORGEOUS but it reminds me that I, too, need to try some Cooks Illustrated recipes. Lately I’ve had some terrible times in the kitchen–it’s been a little disheartening so maybe I should try some Cooks Illustrated-approved dishes. They spend so much time on them that they must be good, right?!
I’ve never done icing that way but it looks stunning. Absolutely stunning!
Hi, Katherine.. it was a fantastic recipe. Don’t you love finding one that turns out so perfect you think, I’ll have to always remember this one! xx